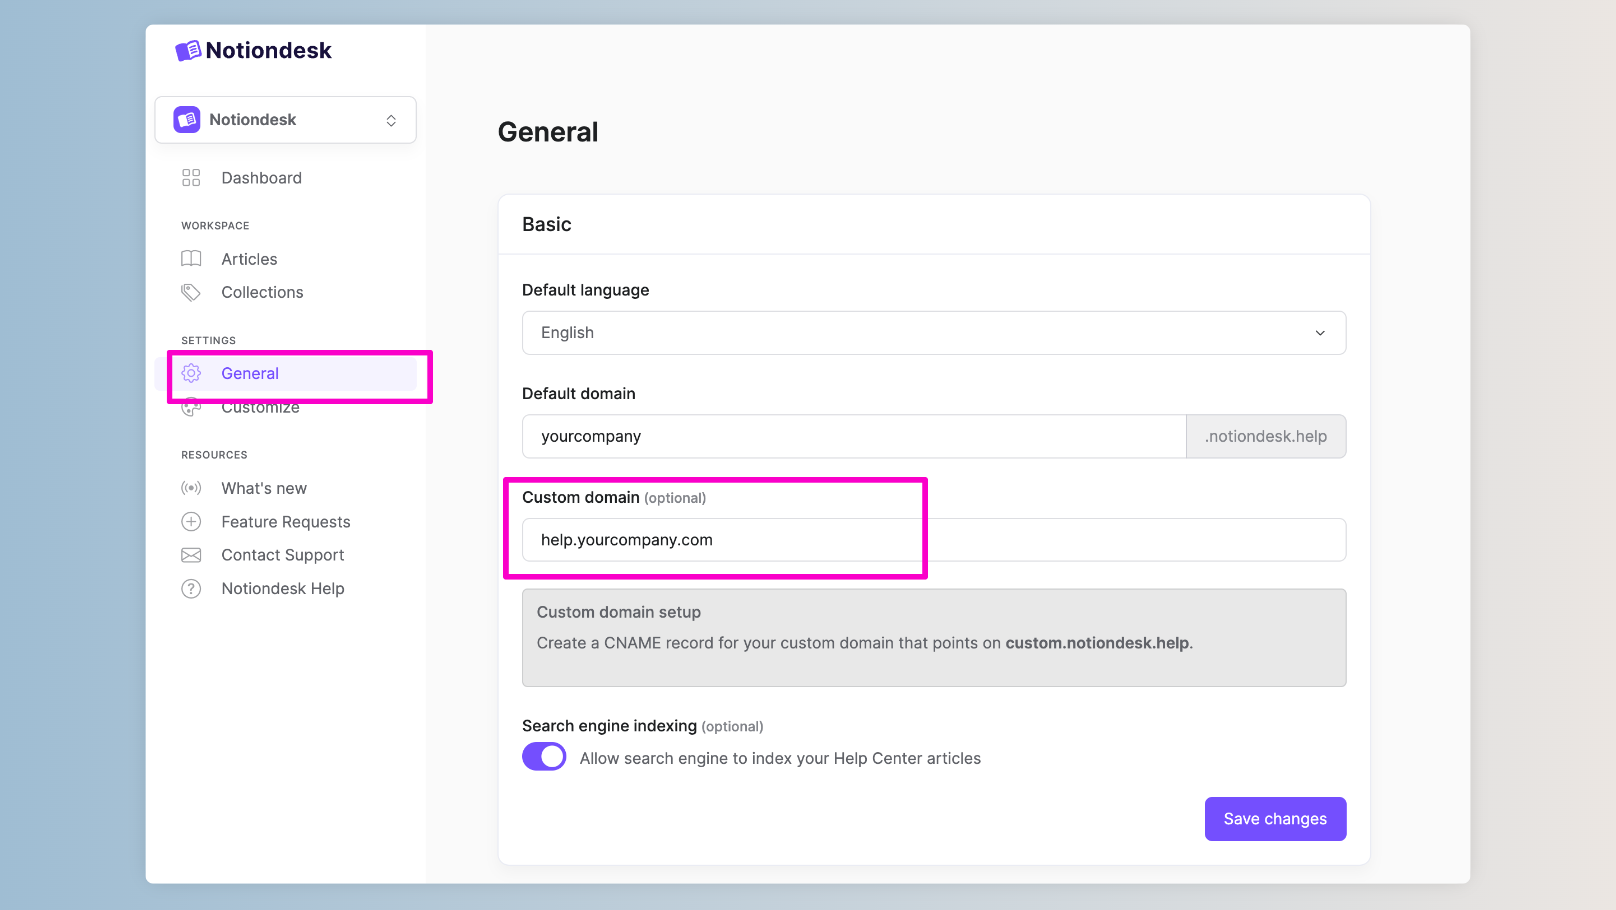
You can replace the default Notiondesk URL with your domain, such as "help.yourcompany.com". This looks more professional and makes it easier for your customers to find your help center.
This article will walk you through setting up a custom domain for your Notiondesk help center!
1. Adding a new CNAME record to your provider
Before connecting your custom domain to Notiondesk, you need to create a CNAME record for your domain that points to the Notiondesk CDN. This will route traffic through our global edge network for faster load times.
A CNAME (Canonical Name) record is a type of DNS record that associates your custom domain with another domain. In this case, we need to create a CNAME record that points your custom domain to Notiondesk's CDN domain, which is "cname.notiondesk.help".
To create a CNAME record, you'll need to access your domain provider's DNS settings. This process may vary depending on your provider, but we've provided links to guides for popular providers below:
- Google domains: Create a CNAME record
- GoDaddy: Add a CNAME record
- Namecheap: How to create a CNAME record
- Planethoster: Domain Management
- Cloudflare: Manage DNS records
Once you've accessed your DNS settings, follow these steps to create a CNAME record for your custom domain:
- Look for the "CNAME" or "Alias" section of your DNS settings and click "Add record" or "Add CNAME".
- In the "Name" or "Host" field, enter your subdomain (e.g. "help" for "help.yourcompany.com").
- In the "Value" or "Points to" field, enter cname.notiondesk.help.
- Save your changes.
It may take 5-60 minutes for your CNAME record to propagate, depending on your DNS provider. Once it has propagated, you can move on to the next step of connecting your custom domain to Notiondesk.
2. Connecting the domain to Notiondesk
Once you've added the CNAME record for your custom domain, the next step is to connect it to your Notiondesk help center.

To do this, follow these steps:
- Log in to your Notiondesk account and go to the General Settings page.
- Enter your custom domain in the "Custom domain" field, such as "help.yourcompany.com".
- Click on the "Save changes" button.
That's it! Your custom domain is now connected to your Notiondesk help center.
Next, let's verify that everything is working correctly.
3. Verifying that everything works
Once you've connected your custom domain to Notiondesk, the final step is to verify that everything works.
To do this, visit your custom domain in a web browser. You should see your help center, now accessible through your custom domain. You'll notice that the URL will have "https://" at the beginning, indicating that your custom domain now uses HTTPS, a secure and encrypted connection.
That's it! You've successfully set up a custom domain for your Notiondesk help center. Congratulations!
Migrating from old CNAME
If you set up your custom domain before February 2026, you may be using the old CNAME target. To benefit from our new CDN infrastructure for faster global performance, you need to update your DNS settings.
Migration steps:
- Access your DNS provider's settings (same provider where you originally set up the CNAME)
- Find your existing CNAME record pointing to
custom.notiondesk.help
- Update the "Value" or "Points to" field from:
- Old:
custom.notiondesk.help
- New:
cname.notiondesk.help
- Old:
- Save your changes
DNS propagation typically takes 5-60 minutes. Once complete, your help center will be served from our global CDN with faster load times worldwide.
If you need assistance with the migration, contact our support team.